Thursday, August 25, 2011

Baby Shower crafted gifts - Clothes Dividers


So I told my aunt that I would help decorate for my cousin's shower. My cousin is having a boy and has a jungle animal theme for her baby accessories. I happened across this tutorial http://adreatravis2008.blogspot.com/2010/08/my-second-video.html and just had to make these part of my gift to her.  Please visit the tutorial and leave some appreciation if you like this project.
I used fun foam for the ovals and cut them out on my die cutting machine as I wanted a larger size than the nestabilities I have. I picked colors that went along with the scheme and mostly replicated animals similar to her sets and added a couple more - the bird and the frog.
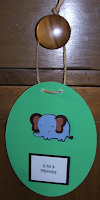
I decided to use some twine I had for more of a jungle/rustic feel. Did you see how the chick is in an oval (or is it an egg)? And because I had two monkeys I thought they needed to be the next size.

With the cutting I had to re trim the ovals as the fun foam had a bit of a perforated look even using the deep blade housing and a very slow cutting speed.

What I did different from my inspiration is that I used twine instead of ribbon, and I made the oval the entire mat for the piece without having rectangles hanging down as I thought they would be easily damaged. I wanted this to be about making new mom's life easier.

Generally I went with the normal animal sizes for the order. The exception is the frog and I just thought he needed to be on "water" blue!
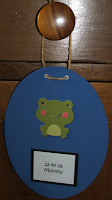
Truthfully it was a fun project with great impact that the mommy to be loved (once I explained what they are! LOL). All the printing was done on the computer onto card stock.

Apologies for the picture sizes. I didn't want the post to scroll forever just repeating the same project but different color and animal but still wanted to share them all with you.

I was trying to work out how to do some groovy things in my photo editing software and starting losing the will to share so when plain and simple. 
IngredientsFun Foam
Card stock
Cricut Create a Critter
Spellbinders Rectangle Nestabilities
Eyelets
Twine


Tuesday, August 23, 2011

Oopsie "Baby on Board" a little more to the right please.

 This card is fairly CAS in my opinion, but then again what do I know!

In the spirit of telling you the ups the downs and the all arounds this isn't exactly the card I was going to make... I had this vision of a single popped layer with airbrushed shading around the image.  All went well until the mask wanted to permanently attach itself to the t-shirt on the oval.  Sheesh! I'm a time limit here.  Did I forget to say the car was packed and ready to go to the baby shower for set up and everyone was waiting for me!...oh I did? Well the car was packed and I guess you get the idea.  Quickly I decide that there is no saving it.  I stamped another t-shirt and promptly got the letter skewed.  ACK! oh no... I'm just going to have to go with it at this point.  So I color it and mount it and pray that all the decorations and paper gifts I made for her will make up for my skewed "Baby on board".  And yes I will start sharing those with you my next post... I probably will divide it over a few posts in case anyone is inspired by my humble little creations.  Thanks for looking and sharing in my oops!

Ingredients
Card size - 4.25 in x 5.5 in
Cardstock - Neenah
Stamps - GinaKDesigns
Ink - Memento
Color - Copics
Dies - Spellbinders
Techniques - Airbrushing, Dimensional layering, Masking, dry embossing

Monday, August 22, 2011

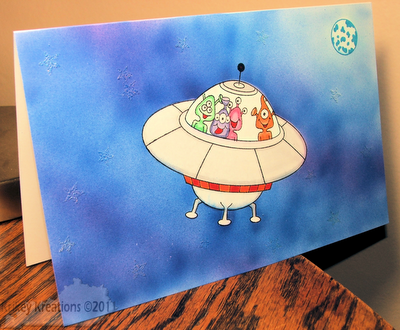
From your favorite Aliens...

When you have a dear friend that is a plane buff and pilot you can get some pretty interesting conversations late at night and one of them was if they had ever seen a UFO...

Of course a UFO only means the flying object was unidentified.  Right? LOL!  So logically the way my mind works when it came time to make a birthday card for our friend I had to play on this conversation.  We are definitely a bunch of goofballs so I'm sure it really wasn't any surprise for our friend to receive such a silly card.


So do you think this is Out of this World?  I won't pretend it is a piece of art but I do like how it all turned out.  And yes, I do see that bit of marker bleeding at the bottom.  I got ready to spend loads and loads of time and effort trying to eliminate it and then realized that a nice shiney flying saucer would reflect the sky around it.  That's my excuse and I am sticking with it!

TBH I'm particularly proud of remembering to put a bit of pink in the space.  Though honestly I could have spaced the Aliens better.  A fun set from Clear Dollar Stamps that I can't wait to find an excuse to use again.

Ingredients
Card size - 8.5in x 5.5 in
Cardstock - Neenah
Ink - Memento
Color - Copics
Other - Embossing (yeah there are some twinkly stars on there)
Techniques - Stamping, Masking, Airbrushing.


Tuesday, August 2, 2011

A Very Dotty Happy 18th!

Can you tell we are absolutely dotty about our neice and she has a special birthday!  Well in England anyway.  They really celebrate 18th and/or 21st birthdays.  The 21st is more traditional but 18th is really popular too especially as they finish secondary school and don't really graduate like we do in the US (They do national exams and get their results a few months later).

I used a couple of Gina K Stamps sets for this.  I stamped the greeting on the white die cut circles with a rainbow of memento colors.  I then stamped the shirt with the lady bug red on scrap paper and before I cleaned it off I added some metallic Tsukineko ink to the stamp and stamped again to keep the color and add a metallic sheen to the lettering on the T shirt.  I cut out the shirt and put foam tape on it.  I then used my Spellbinders dies to cut out circles in both white and black.  I cut and adhered them together adding the shirt to the front and decorating with rhinestones.  Then I made the background layout and decided to go overboard with the dots theme and emboss the background which meant four passes through the folder and machine with some hand embossing to tease out the dots that get smashed in the sides of the folders.

Time to attach the image circle using some more foam tape and of course I just had to add the rainbow dotty ribbon I already had in my stash!  I don't know if it works or not but I like it.  What about you?

Ingredients
Card size -8.5 x 5.5 inches
Cardstock - Neenah, The Paper Source, Georgia Pacific
Stamps - Gina K - Just So Sporty & Little Tees
Ink - Memento, Tsukineko
Accessories - Embossing Folder, Die cuts, Ribbon, Crystals