Sunday, September 30, 2012

Patriotic U Rock

 
Guess you can tell by now I am trying to get my blog back up to date again! LOL! This was another GinaKDesigns Challenge card.  I believe the challenge was patriotic - red, white & blue.  I wanted to do something that was clean and simple and dimensional.  I love the lines of this card and who doesn't enjoy being told they rock!

I took the second picture to show the dimension on this card.  Sometimes I love really complicated cards and other times I like understated.  I like how simple this looks but it takes all the individual components such as layering the star and giving dimension to the hood and pocket of the hoodie that just give it that extra bit of specialness.

Ingredients
Card Size - 4.25 in x 5.5 in
Cardstock - Neenah Classic Crest Solar White Smooth, Archiver's open stock
Stamps - GinaK Designs
Ink - Memento, Versamark
Accessories - Spellbinders star dies, White embossing powder


Saturday, September 29, 2012

Primary Birthday

Yet another challenge card from July from Gina K Designs challenges.  If I remember this one correctly, it was to use primary colors.  I think I mastered that! LOL!  I like it but I don't love it.  I hope I work out what I don't love about it, because I liked the concept.

Ingredients
Card Size -  5.5in x 8.5 in
Cardstock - Neenah Classic Crest Solar White Smooth
Stamps - The Pink Cat Studio, Kitchen Sink Stamps
Ink - Memento
Color - Copics 

Friday, September 28, 2012

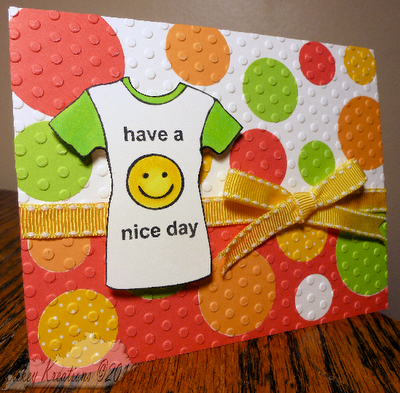
ROY G Have a Nice Day!

 
Another card for another GinaK Designs challenge.  Such a great site and great challenges.  Yeah, the challenge is a couple of months old and we needed to use Red, Orange, Yellow and Green for the challenge.  This just screamed bright and cheerful to me.
 
Just going through my cards, I was thinking, oh I can send that to my son and then I looked at it again and it is quite feminine.  Hopefully I will find a use for it!
 
Ingredients
Card Size - 4.25 in x 5.5 in
Cardstock - Neenah Classic Crest Solar White Smooth, The Paper Studio
Stamps - GinaK Designs
Ink - Memento
Color - Copics
Accessories - ribbon from stock, Spellbinders circle dies, Polka Dot embossign folder


Thursday, September 27, 2012

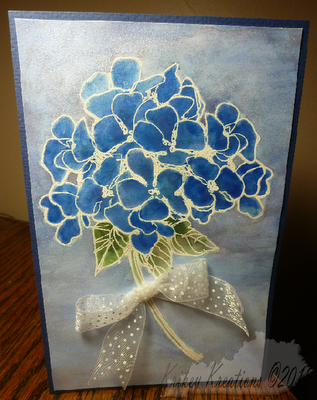
Hydrangea H2O

 
I stamped this for a challenge on GinaKDesigns a while ago to use white embossing powder.  I wanted to make this soft card.  I used Twinkling H20s for the flower and background.  The problem I find with the Twinkling H20s is when to stop.  I'm sure I will get more comfortable with them.  Love the soft, muted but sparkly outcome.
 
Ingredients
Stampendous - Hydrangea
Cardstock - Neenah Classic Crest, Bazzill
Ink - Versamark
Twinkling H20s - Fern, Forest Green, Blue Ice, Ocean Wave, Tanzanite
Accessories - White embossing powder, Ribbon.

Wednesday, September 26, 2012

Yar Har Birthday!

Now if I had been clever I would have had this show up on my blog on talk like a pirate day, so I can cross being clever off my list of things achieved, because I'm just thinking it isn't going to happen now!

For some unknown reason my DH calls me a pirate.  I honestly do not know why.  At the moment it has stuck along with many pirate related punchlines about walking the plank/plundering booty etc.

Now I couldn't really let him get away with that could I?  Here is what I came up with -

 
The process was pretty straightforward.  I stamped my map and colored it in and airbrushed the edges to make it look more pirate-y.  The greeting I printed with a downloadable font and tore it and airbrushed it.  The duck I played with some new to me Hammermill glossy paper.  I don't know how I feel about the paper yet.  I like how it didn't absorb the ink but there is definitely a learning curve if I continue to use it.  It does, however, seem to make my copic brighter if that is possible.
 
Ingredients
Card size - 5.5 in x 8.5 in
Cardstock - Neenah Classic Crest Solar White Smooth, The Paper Studio, Hammermill Color Laser Gloss Paper, Printer Paper,
Stamps - Viva Las Vegastamps
Ink - Memento
Color - Copics


Tuesday, September 25, 2012

Sensei's Birthday


Here we go again with my spinner cards.  I made this card for our Sensei.  He has a quite stressful job as well and I thought this would be a bit of light relief for him to see a comical image of himself spinning back and forth on a card.  He loved it and couldn't put it down.
 
Ingredients
Card size - 8.5 in x 5.5 in
Cardstock - Neenah Class Crest Solar White Smooth, The Paper Studio
Stamps - Stampabilities, Stampendous
Ink - Memento
Color - Copics


Monday, September 24, 2012

Bouncing Baby Olive

I made this card for a baby shower to hold a gift card for Mamma and Baby.  My inspiration was the invitation and I nearly squee'd when Mamma noticed!  The invites were a pocket card with large rose outlines in olive greens and pinks for the colors and some polka dot accents with some pink pearls.  I played with those elements and came up with this.

I really wanted to use my Kangaroo with Joey stamp.  I love this stamp for Baby showers. I used my embossing folder for polka dots.


It was my first attempt at a pocket card.  I tried to take shortcuts and that didn't work so I really looked at the original and worked out where I needed to cut and put the adhesive.  If you look closely at the insert, you can see there is a pocket for the gift card.

Ingredients
Card size - 4.25in x 5.5in
Cardstock - Neenah Classic Crest Solar White Smooth.
Stamps - High Hopes Stamps
Ink - Memento
Color - Copics
Accessories - Embossing folder - polka dots, Ribbon, Pearls.

Sunday, September 23, 2012

Time to Roar!

 
Another card for my university kid!  Gotta keep the chin up and remind them that all the hard work (and play) is worth it!  I made this card for a Gina K challenge  and TBH it was so long ago I can't remember the challenge now.  I sent this to him last week with a box of goodies.
 
Ingredients
Card size - 4.25in x 5.5 in
Cardstock - Neenah Classic Crest Solar White Smooth,
Stamps - High Hopes Stamps, Cornish Heritage Farms, Stampendous
Ink - Memento, versamark
Color - Copics
Accessories - Black cord, embossing powder, Spellbinders die, Airbrushing.


Saturday, September 22, 2012

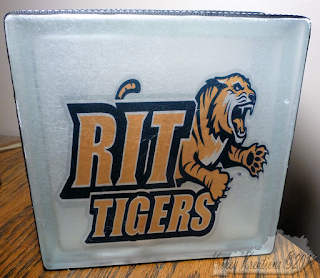
RIT Tigers block

So for graduation I made my cousin's daughter a Bellarmine glass block... well you should have seen the look on the face of my eldest. Absolute devastation at not having got one.  So I had to get to thinking, because to be honest he is picky.  He doesn't admit it but he is.  I found a few of his school's logos* and asked his preference (which wasn't mine LOL) and set to work.  I'm going to go ahead and describe my process again as I changed a few things from the last time.
I measured my block (again) to make certain I had the right measurements for it.  I then printed the image on plain paper and again sized this up to my block.  Then I cut off some tissue paper and  adhered it to the printed plain paper with masking tape about 1/2 inch down from the top to feed it through my printer.  And left it to dry.  I didn't adjust my printer settings because I wanted the black and the orange to be as intense as possible. 


This time with the block I painted on the Modge podge and then stippled it.  I was a bit wary of attempting that again because it didn't work when I did the Bellarmine block but I didn't want the line effect with this block. 
Cutting the tissue paper down to size and rounding the corners then I patiently and carefully adhered it to the block.  If it tears it is possible to push it backtogether, however it depends on how bad.  If it is too bad just wipe the block clean and go back and print another tissue paper, cut it down, stipple the glue on the block to start again.

After completing the RIT Tiger side, I finished off the opposite side with some clipart gears and my student's name the same way as I did the Tiger side.

After both sides were dry it, they were sprayed with Krylon, Matte sealant to seal the printed colors and it also gives this frosted appearance to the block.

Next step, to glue on the black, stiched ribbon with hot glue.  Wow, what a mess that was.  Because the  glass was cold and I only had two hands it would get lumpy.  I think if I do another one I will just use a wet glue.  Then I had to work out how to use the measuring tape ribbon.  Ideally it would have worked in the middle of the block but there is a ridge.  I decided it had to go on one side of the ridge, but didn't have enough for it to go on both sides.  That is when I decided to use similar plain twill ribbon and stamp my own.  I like how it turned out.  The last touch was the satin ribbon on the seam of the block. 

Lastly, I cut the plastic bung for the bottom of the block from the edge to the small hole in the middle and fed the cord of the light through the hole.  I secured the light in an upright position with a  3D Zot glue dot.  The bung for this block was tight so I didn't adhere it closed.


Ingredients
Surface - Krafty Blok Large
Paper/Cardstock -Printed Tissue Paper
Adhesive - Modge Podge, 3D Zots, Glue gun
Stamps - See D's
Ink - Memento Tuxedo Black

Miscellaneous - Ribbon, Krylon Matte Sealer Spray, Night light.


*used under Fair Use h
ttp://en.wikipedia.org/wiki/Fair_use

Friday, September 21, 2012

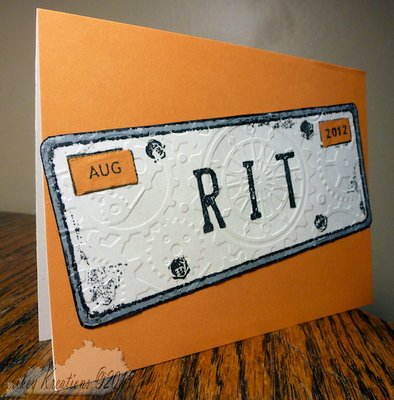
The writing is on the Road

 
I gave this card to my son who is a Mechanical Engineering major at RIT.  I wanted to create the subtle background impression so after stamping and coloring the frame of the plate I embossed it with my gears folder.  I stamped the date and cut it out and adhered it. 
 
The real trick to this card was keeping it a secret from my son over the summer.  I think he was truly touched when I left him (after helping him move in) with a card from home as he embarked on his new journey or it could have been the money inside! LOL!
 
Ingredients
Card size - 4.25 in x 5.5 in
Cardstock - Neenah Solar White Classic Crest Smooth
Paper - The Paper Studio
Stamps - Autumn Leaves "License Plate"
Accessories - Cuttlebug Gears embossing folder

Thursday, September 20, 2012

Pink Lady Diva Birthday!

Again I am catching up posts with my cardmaking! Maybe one day I will get it all done at the same time - yeah, keeping the dream alive!
 

I created this card for my neice's birthday and for a GinaK challenge that was all about Pink.  Lots of glitter and shoes and you really can't go wrong for a girlie birthday!  I double stamped the shoe one on the diecut and the other on a spare bit of cardstock to cut out and pop up to create a pair of shoes. 
 
Ingredients-
Card size - 8.5 in x 5.5 in
Cardstock - Neenah Solar White Classic Crest Smooth, The Paper Studio, Recollections
Stamps - I Brake for Stamps
Ink - Memento
Color - Copics
Accessories - glitter, ATG tape, Martha Stewart glue, rhinestones, Spellbinders dies